
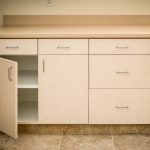
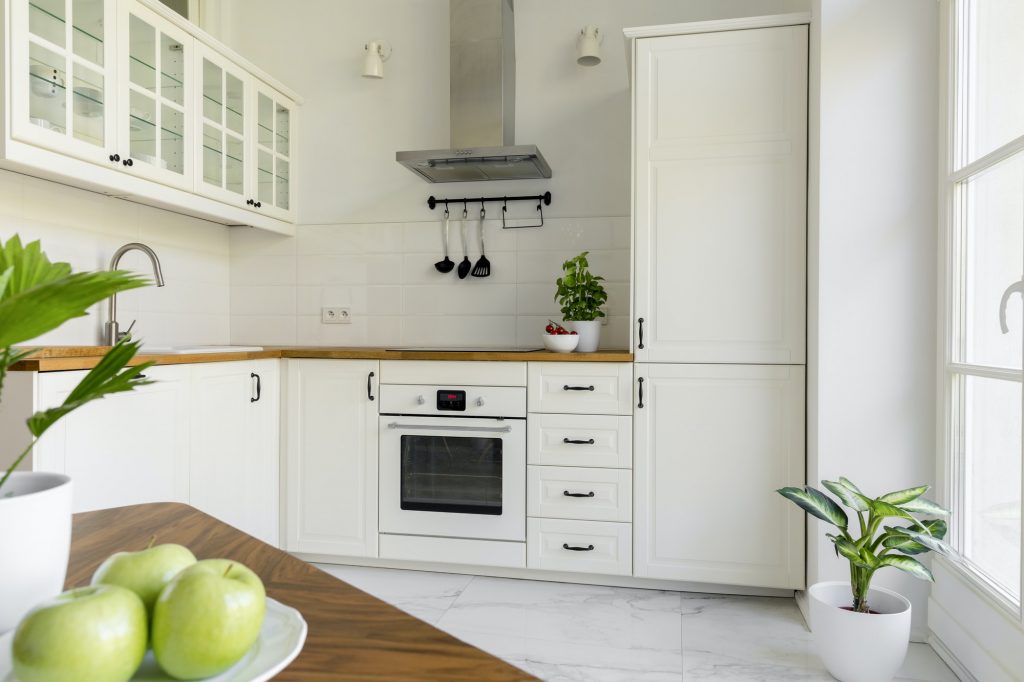
One of the most personal, unifying choices in a new room is the cabinet knobs and pulls.
Putting in your own knobs or pulls isn’t as simple as just drilling a couple of holes and being done with it, but with the right preparation and understanding, you can avoid having a humongous job on your hands.
When it comes to installing knobs and pulls, the hardest part is usually getting the cabinet placement correct. The easiest way to accomplish a seamless design is to use a template. You can purchase jigs for this exact purpose, or you can make one with very few supplies.
We’ll show you how to do that here, so you can limit any mistakes you may make to the template without ruining your (often expensive) door.
Let’s dive into how to install cabinet pulls and how to install cabinet knobs by first creating a template. The best part about going with the homemade template route is that you’re likely to have everything you need on hand already without the extra trip to the store that a pre-made jig could require. Plus, if you mismark your template, no harm done–it’s just cardboard.
Supplies
- Cardboard, Card Stock, or Paper
- Pen or Pencil
- Tape Measure
- Painters tape
- Drill
- Drill Bits
Installing Drawer Pulls
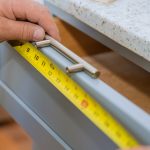
- Measure the face of the drawer and cut your cardboard to size. If you have an inset style, you only need to measure the area of the inset panel. Alternatively, if you have a raised panel, you only need to measure the raised panel.
- Find the center of the panel and mark with painters tape.
- Mark the middle of the cardboard that is cut to size and mark with a pen or painters tape.
- Find the middle of your pull by measuring the distance between the holes for the screws.
- Line up with the middle of your cardboard with the middle of the pull.
- From the opposite side use your pen to poke a hole in the template where the holes are on the pull.
Attaching Your Hardware
This step might be easier with a second pair of hands, but can be done by yourself with a little patience.
- Line up the middle of the cardboard with the middle of the drawer and using your pen or pencil, mark the holes on the drawer front.
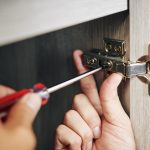
- Drill holes where you have marked and attach your hardware.
- For each drawer front simply find the middle of the drawer, line up your template, mark the holes, attach, and done!
Installing Door Knobs
Installing door knobs and pulls is very similar to the drawers with just a couple things to keep in mind. The standard cabinet knob placement is three inches up when working on upper cabinets and three inches down when working on lower cabinets.
IMPORTANT! Remember to attach knobs and pulls on the side rail, the frame, of the door, not the panel. The rails are firmer and thicker and better able to take attaching hardware such as screws and nails without splitting. Never attach to the panel, as you may ruin your door.
Quick Tip:
If you are using pulls instead of knobs, measure three inches from the top or bottom of the door. Hold up your pull with the template you have cut to size and mark where you want your pull to land. Remember to keep in mind the three inch mark.
When you are done installing, take a step back and admire what you’ve accomplished. If you have gone through the process of a full cabinet refacing then you’ve done it all, from measuring for new doors and drawer fronts, to installing hinges and hardware!
If you need any help with this process please give us a call. As always, our customer service team is ready to help!